
Capture
Business Process
For payment methods that support separate Capture (such as international credit card payments), the payment process is completed in two steps:
- Authorization: Verify the shopper's payment details with the issuer and reserve funds.
- CAPTURE: Transfer the reserved funds from the shopper to your account.
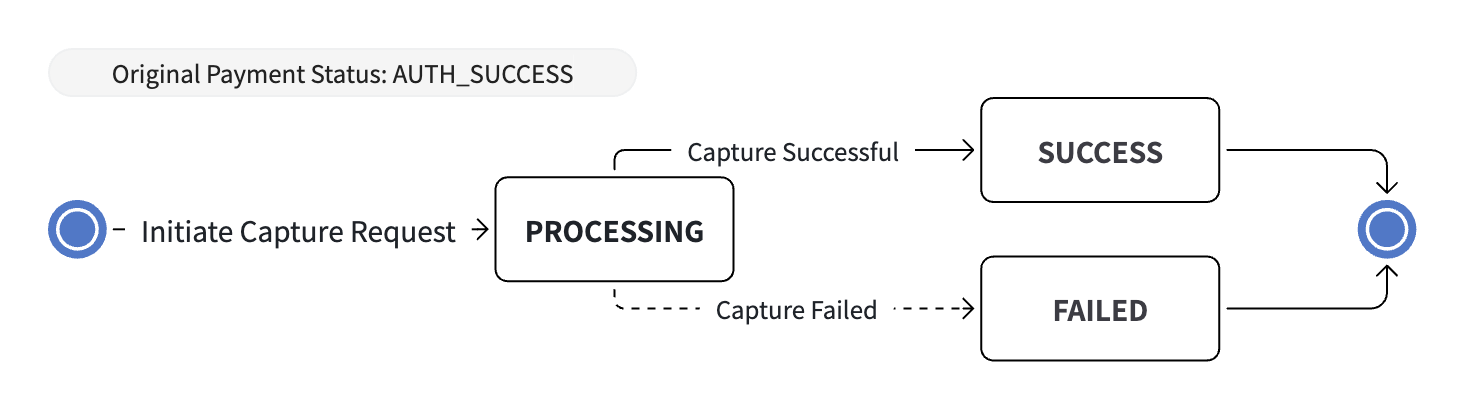
Capture State Machine
Pre-authorization Capture can only be initiated when the original payment is in AUTH_SUCCESS status. After Capture succeeds, the original payment is finally charged and moves to SUCCESS. If Capture fails, record the failure reason based on the Capture object's status, then decide whether to retry Capture or void the authorization according to your business scenario.
Supported Capture Strategies
- Automatic Capture: Payment is captured immediately after authorization. This is the default setting.
- Manual Capture: You capture each payment by making a request to the CAPTURE-Pre-authorization Capture API.
The pre-authorization is valid for 7 days from AUTH_SUCCESS. If the capture is not completed in time, the authorization is automatically voided. When using Manual Capture, initiate the capture within the validity period.
Automatic Capture
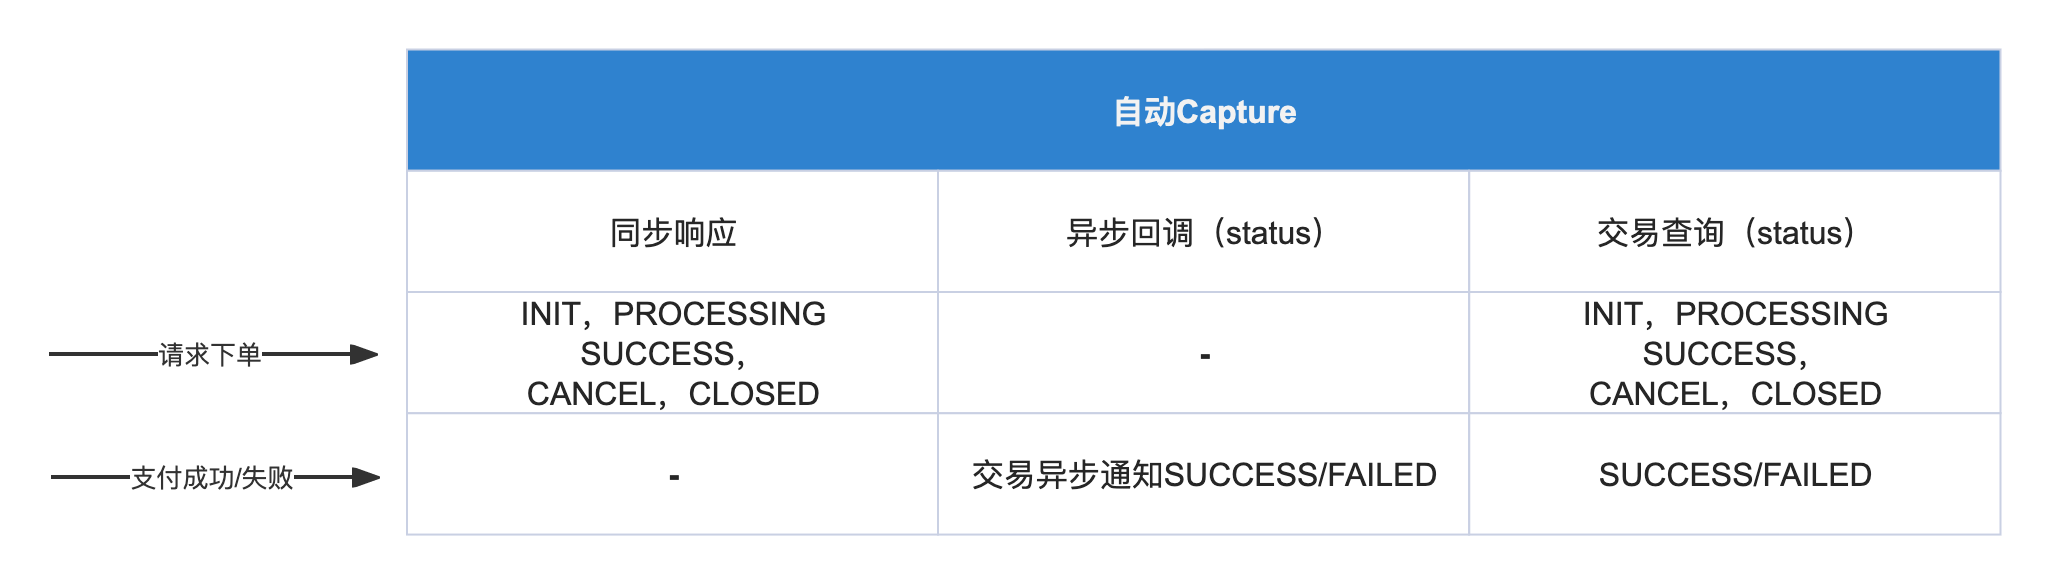
This is the default behavior, no setup required. After requesting payment, Capture will be performed automatically. You only need to set up transaction asynchronous notifications to monitor transaction status changes. When you receive the SUCCESS status, it means the transaction is successful, no need to call the CAPTURE-Pre-authorization Capture API
Status obtained in different scenarios
Manual Capture
step 1 Enable Manual Capture
To use manual Capture, you must manually set the enable feature. When requesting the order interface or order and pay, set captureDelayHours to -1, and the payment method used must support manual Capture
| captureDelayHours | Notes |
|---|---|
0 | Automatic capture immediately after order placement, no need to manually call CAPTURE-Pre-authorization Capture |
-1 | Manual capture, after success you still need to call CAPTURE-Pre-authorization Capture, local payments are not supported |
step 2 Confirm the timing to execute Capture
When you set to enable manual Capture in the payment request, you need to call the CAPTURE-Pre-authorization Capture API at the appropriate time.
Execute Capture must be after Authorization approval is obtained. Therefore, you must receive the AUTH_SUCCESS - pre-authorization success status in the synchronous response of the payment interface or transaction asynchronous notification, then call the CAPTURE-Pre-authorization Capture API according to your actual business situation.
Note that the pre-authorization expires 7 days after AUTH_SUCCESS. If no capture is initiated within this period, the authorization is automatically voided.
step 3 Set key parameters
To call the CAPTURE-Pre-authorization Capture API, you need to set some important parameters
merchantTransactionId, themerchantTransactionIdof the authorization that can be captured from the payment response or asynchronous notification.merchantCaptureId, the serial number for the capture request, globally unique, must be different for each request.notificationUrl, after calling Capture, the synchronous response may be inPROCESSINGstatus. When you setnotificationUrl, the Capture status will be notified to the URL set innotificationUrl, message details see Pre-authorization Capture Notification
step 4 Handle Capture Status
After we process your Capture request, we will send you an asynchronous notification, message details see Pre-authorization Capture Notification.
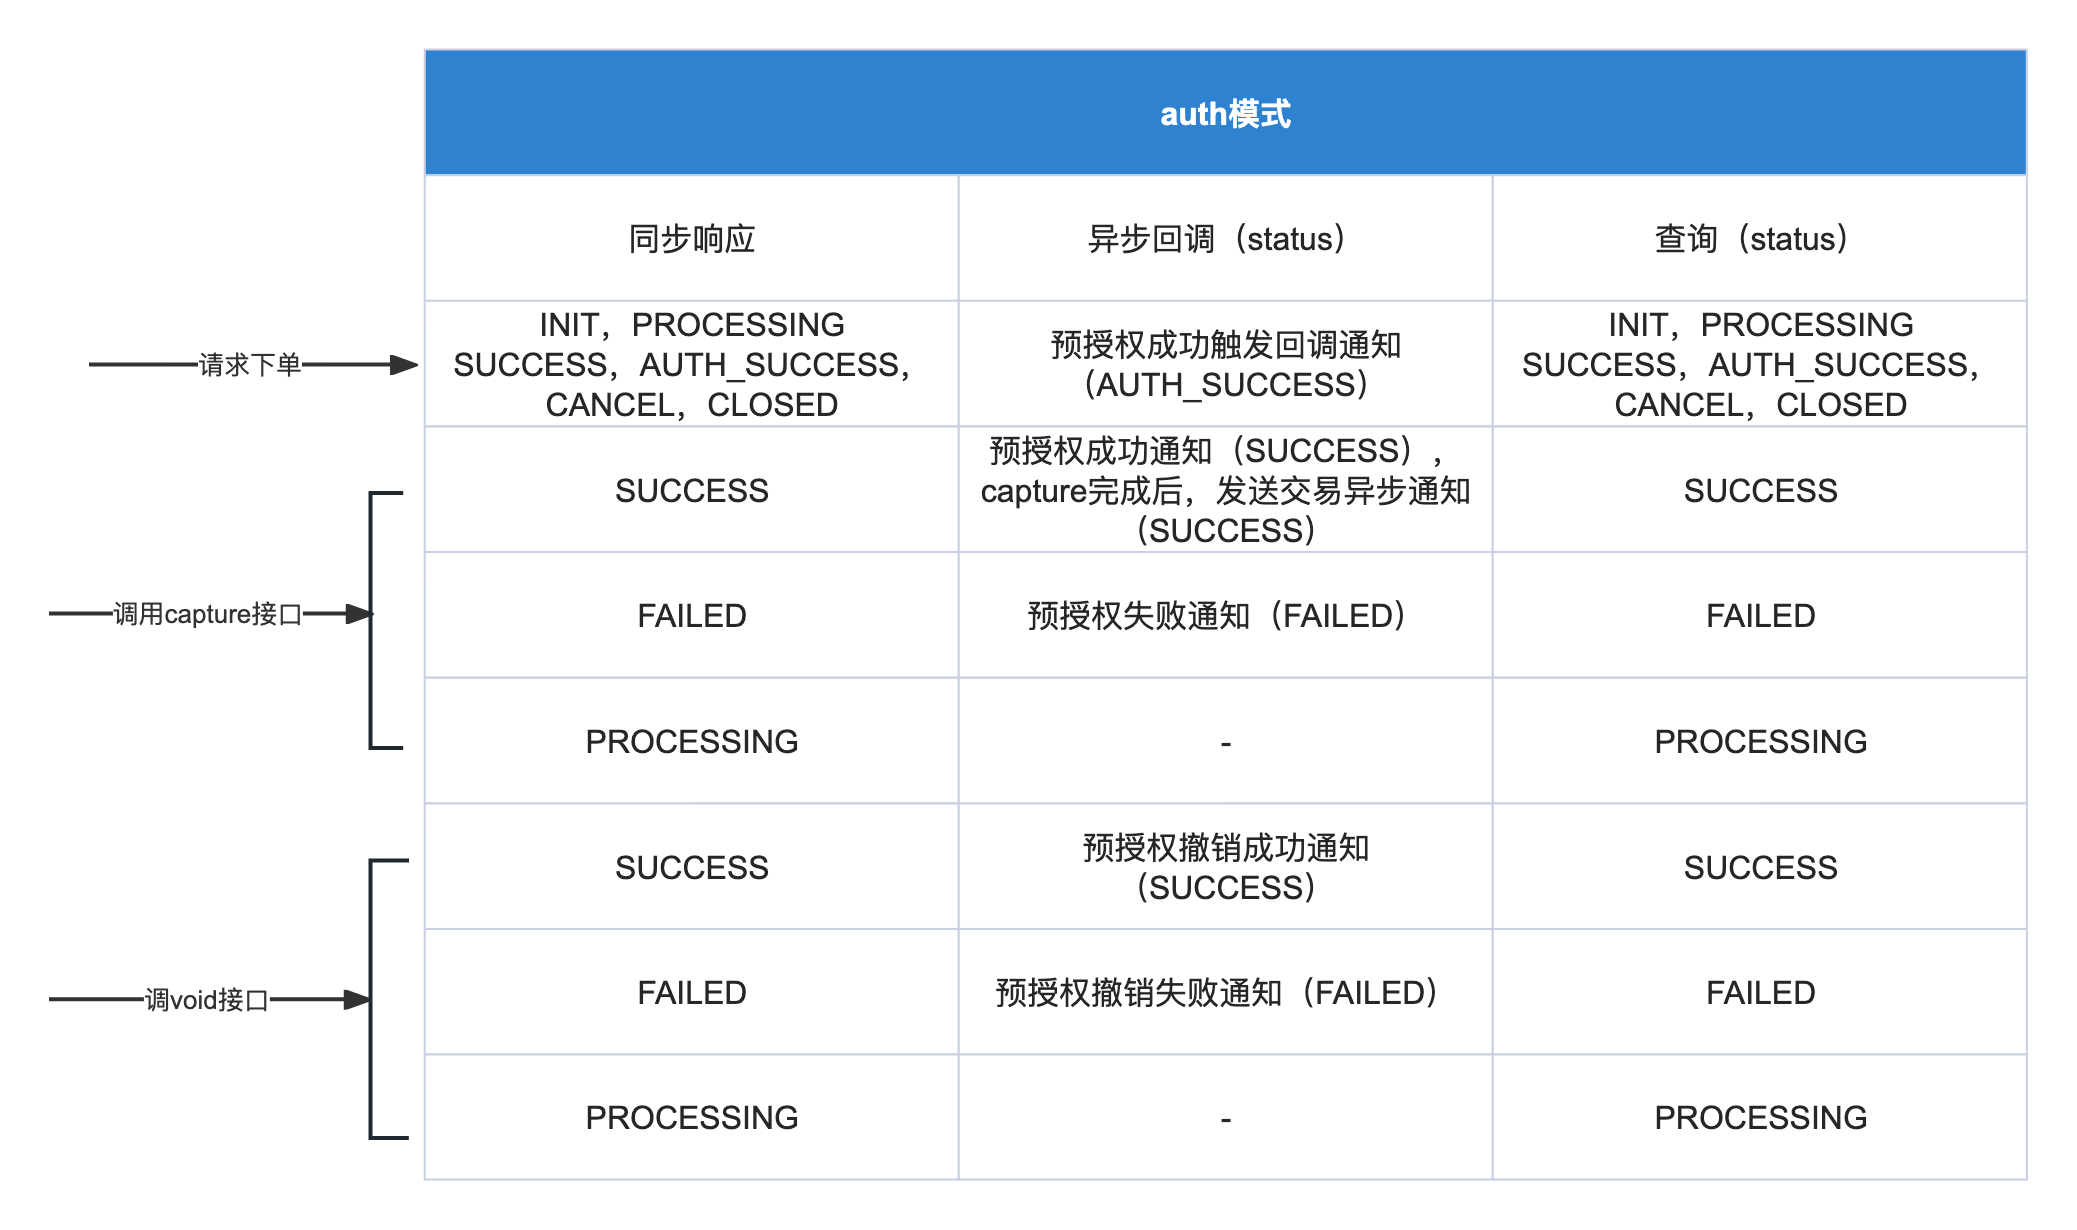
In the synchronous response of the Capture request, status can return SUCCESS, FAILED, or PROCESSING.
In the Capture notification flow, status returns the final Capture result, which is either SUCCESS or FAILED.
Note
When you don't receive asynchronous notifications or cannot confirm the status, you can call Pre-authorization Capture Query. In the query response, status can return SUCCESS, FAILED, or PROCESSING.
According to the status value:
SUCCESSCapture successful, at this point the transaction is complete, the reserved funds are transferred from the shopper to your accountFAILEDCapture failed, transaction failed, funds will remain frozen untilVOIDis executed, or theAuthorizationexpires and funds are automatically released.
Status obtained in different scenarios
Multiple Captures
The CAPTURE-Pre-authorization Capture API is idempotent based on merchantCaptureId, you can safely call it multiple times.
Note
Partial CAPTURE is currently not supported, the total amount of CAPTURE must equal the transaction amount
- When
merchantCaptureIdis the same, calling the CAPTURE-Pre-authorization Capture API again, you will get the query result. - When calling the CAPTURE-Pre-authorization Capture API fails and needs to be retried, you need to update
merchantCaptureIdand initiate the request again.